20 Year Warranties: Mechanical Lock Standing Seam Specs Contractors Use
Technical specs for contractors on mechanical lock standing seam: when to choose single or double lock, the hand crimp to seamer sequence, clip planning,...
Mechanical lock standing seam is a concealed-fastener metal roof system where adjoining panel edges get mechanically folded together, either 90 degrees (single lock) or 180 degrees (double lock), to form a weathertight joint. Contractors spec it for low-slope roofs, high-wind zones, and any job where the warranty demands more than a snap-together seam can deliver. It costs more labor and equipment than snap-lock, but it buys you performance headroom you can’t get any other way.
TL;DR:
- Mechanical lock seams provide superior water resistance on low-slope and high-wind roofs, especially when double-locking and sealants are used.
- Installing mechanical lock panels requires a seamer, which adds labor and cost but ensures wind uplift and water infiltration performance that snap-lock cannot achieve in severe conditions.
- Double-lock seams are necessary for high-warranty projects and can perform reliably on slopes as low as 3 degrees when properly sealed, while single-lock seams are suitable for steeper slopes.
- Proper installation sequence, including hand-crimping critical zones and using floating clips for expansion, is crucial to prevent seam failure and oil-canning over time.
- Contractors should account for seamer costs upfront, prioritize correct clip spacing, and consider on-site roll forming for longer runs to optimize job quality and efficiency.
Table of Contents
- What Is Mechanical Lock Standing Seam and Why Contractors Specify It
- Mechanical Lock vs Snap-Lock: Pros, Cons, and Contractor Trade-Offs
- Single Lock vs Double Lock: Construction Detail and When to Specify Each
- Panel Profiles, Materials, Gauges, and Finish Options
- Installation Workflow: Tools, Sequencing, and Clip Selection
- Wind Uplift, Low-Slope Detailing, and Thermal Movement
- Field-Tested Tips and How MidAtlanticMetalPanels Supports Your Crew
- What Actually Matters on a Mechanical Lock Job
- Ordering Mechanical Lock Panels From MidAtlanticMetalPanels
- Sources
What Is Mechanical Lock Standing Seam and Why Contractors Specify It
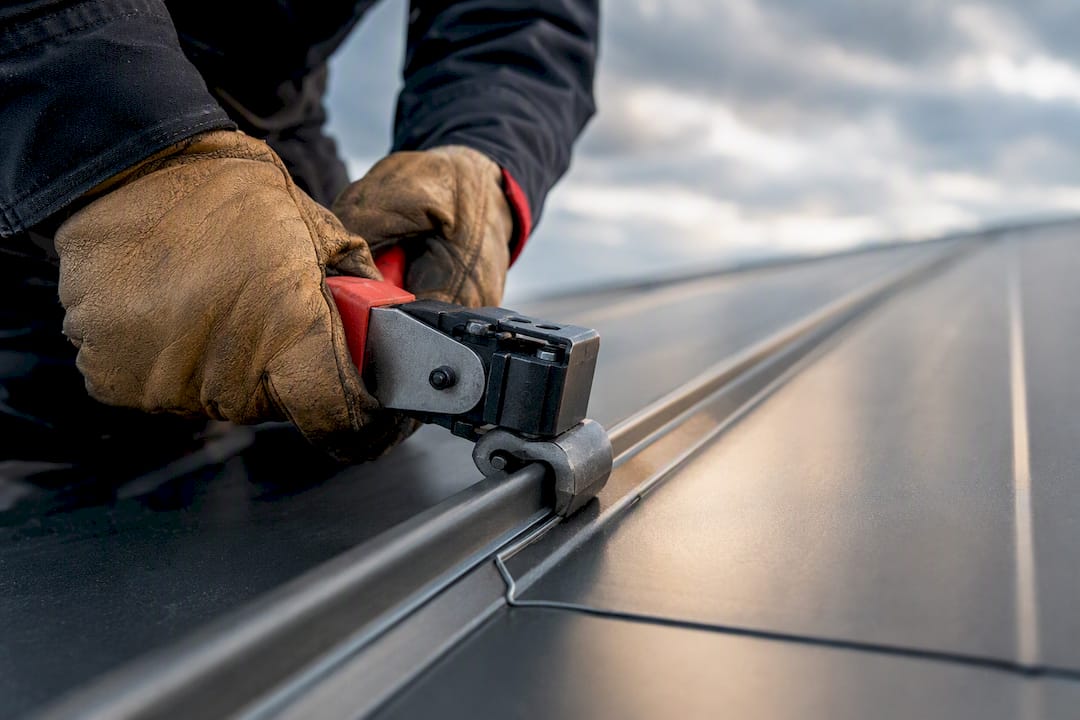
The panel edges on a mechanical lock system have male and female profiles that get crimped together with a hand tool or motorized seamer, rather than snapped by hand. That crimped joint resists uplift and water infiltration far better than a friction-fit seam, which is why Stortz identifies mechanical lock as the go-to choice for roofs facing severe weather or slopes below the range where snap-lock panels are reliably watertight.
Rib heights typically run 1 inch or 1.5 inches, and both accept single or double locking depending on the seamer and profile selected. The fastener sits under the seam, covered by the interlocking fold, so there’s no exposed screw head for water to find. That’s the core selling point: no penetration through the weather surface, and a joint you can mechanically tighten rather than hope stays clipped.
Contractors reach for mechanical lock standing seam in a handful of recurring scenarios: metal roofing with mechanical locks on institutional and commercial low-slope applications, coastal and high-wind residential work, and any project where the manufacturer’s weathertight warranty explicitly requires it. It’s also the default for architectural work where the client wants a crisper, more monolithic seam line than snap-lock typically produces.
Mechanical Lock vs Snap-Lock: Pros, Cons, and Contractor Trade-Offs
Snap-lock panels install faster because the seam locks by hand pressure alone, no seamer required. That speed advantage disappears the moment the job calls for a slope under roughly 3:12, coastal wind exposure, or a manufacturer weathertight warranty, all of which typically require mechanical seaming.
Here’s how the two systems actually compare in the field:
- Weathertightness and low-slope suitability: Mechanical lock, especially double-lock, holds up on low-slope applications where snap-lock panels risk capillary water intrusion under wind-driven rain.
- Installation speed and labor: Snap-lock wins on speed and crew size. Mechanical lock adds a seaming pass and, on larger crews, a dedicated seamer operator.
- Maintenance and repairability: Snap-lock panels can sometimes be unsnapped and replaced individually. Mechanical seams require cutting or re-forming the lock, which takes more skill but produces a more durable repair once done.
- Typical gauges and materials: Both systems run comparably in 24-gauge and 26-gauge steel, aluminum, copper, and stainless, so material choice doesn’t usually decide between them.
- Thermal movement handling: Both rely on clips, but mechanical lock systems more often pair with floating-clip designs on longer runs since the rigid seam transmits more expansion stress to the clip line.
The trade-off comes down to where the job sits. A steep-slope residential re-roof in a moderate climate rarely needs the extra labor of mechanical seaming. A low-slope commercial roof, a coastal property, or any project carrying a 20-year-plus weathertight warranty usually isn’t a good fit for snap-lock. Panel systems built specifically for mechanical seaming are engineered around that seamer requirement from the start, which tells you where manufacturers themselves expect the system to get used.
Pro Tip: Price the seamer rental or purchase into your bid before you commit to mechanical lock on a smaller job. Drill-powered seamers have brought that cost down significantly, but it’s still a line item snap-lock doesn’t carry.
Single Lock vs Double Lock: Construction Detail and When to Specify Each
A single-lock seam folds the panel edge 90 degrees over the adjoining panel’s flange, one bend, one engagement. A double-lock seam takes that same joint through a second fold, wrapping it a full 180 degrees for a tighter, more compressed mechanical bite. The extra fold is the entire difference, but it changes what the seam can handle.
Double-lock seams are the standard where a manufacturer’s weathertight warranty is on the line. elZinc’s installation guidance states double-lock systems can perform down to roughly 7 degrees of pitch, or as low as 3 degrees when the seams are also sealed, which is well below where single-lock or snap-lock panels are typically rated to perform reliably. Single-lock work still has a place, particularly on steeper slopes, historically accurate copper restoration, and jobs where the labor savings matter more than the last few percentage points of wind and water performance.
Minimum slope guidance varies by manufacturer and panel profile, but a few practical bands hold across most systems:
- Double-lock with sealant: down to roughly 3 degrees pitch on many systems.
- Double-lock without sealant: commonly rated around 7 degrees minimum.
- Single-lock: generally reserved for steeper slopes where the extra fold isn’t structurally necessary.
Field folding with hand tools works fine on short runs and repairs, but machine seaming produces a more consistent finish and is the only practical option for double-locking long runs efficiently. If your crew is hand-crimping an entire commercial roof, you’re burning labor hours a seamer would save.
Panel Profiles, Materials, Gauges, and Finish Options
Rib height is the first spec decision, and it’s mostly a visual and structural call. One-inch ribs give a tighter, more traditional standing seam look and work well on residential and lower-profile commercial jobs. 1.5-inch and 2-inch ribs read as more architectural and tend to show up on institutional and higher-end commercial projects where the seam line itself is a design feature.
Finished coverage widths on most mechanical lock panels fall in a similar range regardless of rib height, though wider panels reduce seam count and installation time at the cost of slightly higher oil-canning risk on flat substrates. Standard product lines document these dimension tables alongside minimum slope and clip requirements, which is worth pulling before you finalize a takeoff.
Material and gauge choices affect cost, weight, and longevity:
- 24-gauge and 26-gauge steel: The most common combination for mechanical lock panels, balancing cost against stiffness and denting resistance.
- Aluminum: Lighter and corrosion-resistant, a common choice for coastal work where steel’s rust risk outweighs its cost advantage.
- Copper and stainless: Premium options for architectural and historic restoration work, priced well above steel but with a service life measured in decades rather than years.
Finish systems matter as much as gauge. PVDF coatings, commonly known by the Kynar brand name, resist chalking and fading far longer than baked enamel finishes, and most manufacturer weathertight warranties assume a PVDF-class finish is in play. If a client wants the roof to still look sharp at year 20, the finish spec deserves as much attention as the seam type.
Panel length strategy also shifts depending on whether panels come shop-formed or roll-formed on site. Shop production caps out around standard shipping lengths, while on-site forming lets you run continuous panels the full length of a slope, which changes your clip spacing and expansion planning since you’re no longer breaking runs at transport-length joints.
Installation Workflow: Tools, Sequencing, and Clip Selection
Getting a mechanical lock seam right isn’t complicated, but the sequence matters more than most first-time installers expect. Skip a step and you’ll get a seam that looks fine until the first hard freeze thaw cycle finds the weak point.
- Prep the substrate and layout. Confirm deck condition, install high-temperature underlayment rated for the climate, and lay out panels with clip spacing matched to the manufacturer’s wind and thermal tables.
- Set your clips before panel placement. Decide fixed versus floating clips now, not after panels are down. Floating clips let panels move with temperature swings on longer runs; fixed clips anchor shorter runs where movement is minimal.
- Hand-crimp the critical zones first. Installation manuals consistently call for hand-crimping the first 8 inches at the eave, endlap, and ridge before the mechanical seamer ever touches the panel. This gives the seamer a guided starting point and prevents the seam from wandering off-line.
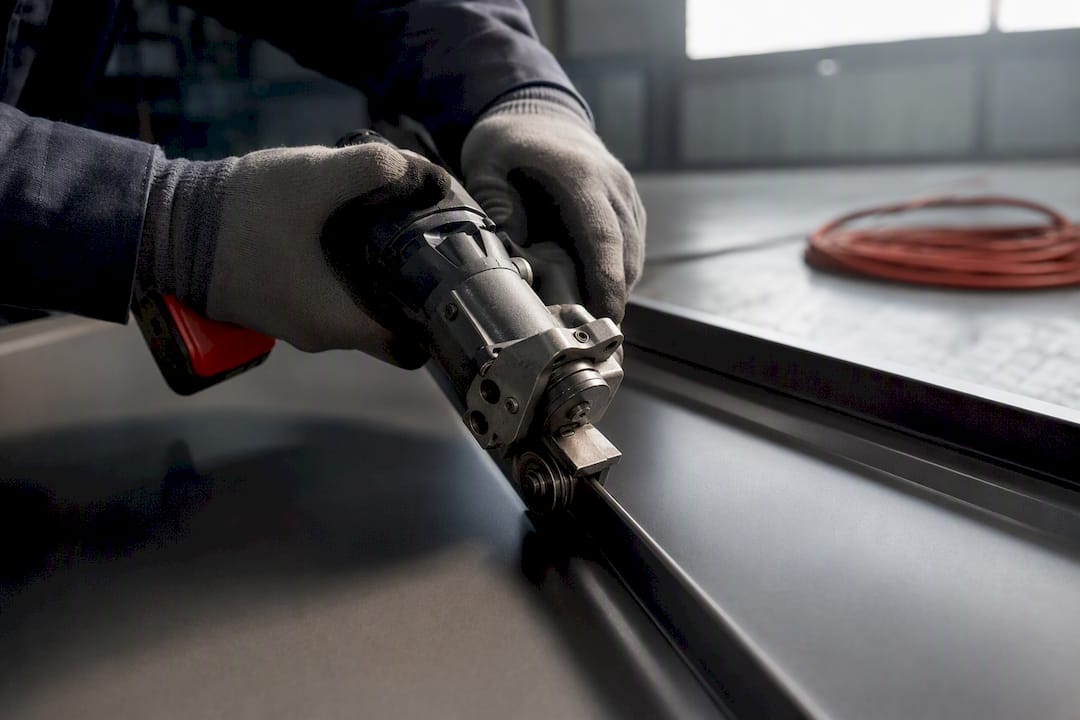
- Run the mechanical seamer ridge-to-eave. A drill-powered or electric seamer travels the seam length, closing the lock continuously. Tools like a Stortz 2-in-1 seamer are built specifically to protect panel finish while forming both single and double locks, which matters on PVDF-finished panels where scuffing shows.
- Never crimp directly over a clip. Crimping at a clip location can distort the clip’s holding geometry and create a hard point that fights thermal movement instead of accommodating it.
Pro Tip: Keep small C-clamps on hand during seamer runs. Clamping the horizontal leg of the seam ahead of the seamer keeps panel engagement consistent and prevents the seam from mismatching on longer runs, a trick more field crews use than manufacturers ever mention in writing.
Drill-powered and compact seamers have made mechanical locking viable even on small repair jobs, where renting a full seaming rig used to be the barrier. That shift alone has pulled a lot of smaller crews into mechanical lock work that used to be exclusively snap-lock territory.
Wind Uplift, Low-Slope Detailing, and Thermal Movement
Ask for wind uplift test data before you accept a panel for a high-exposure job. Manufacturers publish ratings tied to ASTM and UL test protocols, and a spec writer or building official will often want that number on file before sign-off, particularly in coastal counties with tightened wind provisions.
Thermal movement is the quiet threat on long panel runs. Steel and aluminum panels expand and contract measurably across a summer-to-winter temperature swing, and a seam with no room to move will eventually buckle or tear at the clip line.
- Use floating clips on runs longer than the manufacturer’s fixed-clip threshold, typically specified per product line.
- Leave the expansion gap the clip system is designed around, don’t tighten it out during installation.
- On low-slope applications, plan for in-seam sealant and manufacturer-approved underlayment rather than relying on the mechanical seam alone.
- Watch panel width and substrate stiffness together. Wider panels over a soft or uneven substrate are where oil-canning shows up worst.
Floating-clip systems with a designed expansion gap and a mix of fixed and sliding clips at specified intervals are what keep long runs from buckling as the panel moves seasonally. Get the clip table from the manufacturer for your specific panel width and gauge rather than guessing at spacing, because that number changes with rib height and material.
Oil-canning isn’t a defect in the panel itself so much as a visibility problem created by substrate flatness and panel width working against each other. Tighter clip spacing and a stiffer substrate reduce it, but no clip schedule eliminates it entirely on wide, flat panels under low-angle light. The same substrate stiffness principles that govern engineered wood panel behavior in wall and diaphragm design apply loosely here too: a deck that flexes under load will telegraph through a metal panel no matter how well the seam is formed.
Field-Tested Tips and How MidAtlanticMetalPanels Supports Your Crew
The details that separate a clean mechanical lock roof from a callback aren’t complicated, but they’re easy to skip when a crew is racing a schedule. Hand-crimp the eave, endlap, and ridge before the seamer runs. Never crimp over a clip. Give the panel room to move thermally instead of pinning it down tight everywhere.
MidAtlanticMetalPanels supports that workflow directly rather than leaving contractors to source everything piecemeal. We supply custom-length panels cut and dropped to the jobsite in 24-gauge and 26-gauge Englert systems, along with on-site roll forming when a run is too long for standard shop lengths. Trim and flashing packages ship matched to the panel order, so your crew isn’t scrambling to source a ridge cap or eave trim mid-job. That’s the practical side of mechanical lock work: the seam detail matters, but so does whether the right panel length shows up on the right day.
What Actually Matters on a Mechanical Lock Job
Most articles on this topic treat single lock versus double lock as a binary performance question. It isn’t. The real decision driver on most jobs is warranty language, not raw weather performance, since a lot of moderate-slope residential work would function fine with either seam type. Contractors who default to double-lock on every job because “it’s stronger” are often burning labor hours a spec didn’t actually require.
Where the conventional advice falls short is in treating the seamer pass as the hard part. It isn’t. The hand-crimp sequence at eaves, endlaps, and ridges is where seams actually fail when crews skip it, and it’s the step most likely to get rushed under schedule pressure. A seamer running a poorly guided seam just closes a bad joint faster.
If you take one thing from this guide, prioritize the clip plan before you ever pick up a seamer. Getting floating clips and expansion gaps right up front prevents more callbacks than any seam-type debate ever will.
— Matt Catino
Ordering Mechanical Lock Panels From MidAtlanticMetalPanels
This service cuts out the guesswork contractors deal with when sourcing mechanical lock panels from multiple vendors by delivering custom-length panels directly to the jobsite, formed in 24-gauge or 26-gauge steel, helping avoid reordering or field-cutting when a run comes in short.
Before you request a quote, have your panel profile, gauge, finish, panel lengths, clip preference, and jobsite access details ready. That information lets us turn around a takeoff fast instead of going back and forth on specs. Whether you’re running 1-inch mechanical lock panels on a low-slope commercial job or need trim and flashing matched to an existing order, our contractor supply team handles both cut-and-drop delivery and on-site roll forming for runs that exceed standard shop lengths. Contact us to request a quote and lock in lead times for your next standing seam project.
Sources
For spec-level confirmation, review Stortz’s mechanical lock installation guidance, elZinc’s double-lock system pages, and ENERGY STAR’s federal tax-credit guidance for metal roofs.